Big Agnes Copper Spur UL1 Tent![]()
I shopped for a tent about 6 months before deciding to do my PCT thru-hike. At the time, I was using a Tarptent Rainbow, and was sick of a couple problems I was having with it: Condensation, and driving stakes in hard ground.
First, let me explain a few terms to describe tents:
Free-standing: Free-standing tents can stand up without any stakes. This is handy on nights that aren’t windy, or ground that is difficult to drive stakes into. Some tents, like my Tarptent Rainbow, are not free-standing — they’ll tip over if you don’t drive the stakes into the ground. Non-free-standing designs tend to be lighter, but you need to drive stakes every night, even if there is no wind, and even is the ground is not receptive to stakes.
Recently, a type of tent has appeared on the market called “semi-free-standing”. These can stand up without stakes, but the roof will sag onto your feet unless you stake two corners of the tent down. This is less staking than non-free-standing tents, which usually require at least 6 stakes.
Single/Double-wall: A double-wall tent is made of two pieces: A tent body, made primarily of mosquito netting, and a rain fly, which is a waterproof sheet that can be pitched above the body. Single-wall tents have only one roof, and it’s waterproof — the body is the rain fly. There is therefore no need for a separate rain fly. Single-wall tents are substantially lighter than double-wall tents, since there are fewer walls. For the same reason, they can also be faster to set up.
Double-wall tents have several major advantages over single-wall. You can leave off the waterproof roof when you don’t need it, so you can see the stars. Leaving off the rain fly is also nice on very hot nights, when a waterproof roof will trap too much heat (though on my PCT hike, I only had a few such nights). Additionally, the air circulation between the rain fly and mesh body of a double-wall tent greatly reduces condensation — single-wall tent owners often wake up to find their walls and roof coated in water. On windy nights, a condensation-coated roof that’s flapping in the wind will drop water on you. When you do get condensation in a double-wall tent, almost all of it will be on the rain fly, which is easier to hang up and dry than a single-wall tent body.
Vestibule: This is an area outside the door of your tent, but still under the rain fly. That is, it has a roof, but no floor or walls. It’s useful for storing gear overnight that you don’t want inside the tent body, but want near your tent and protected from rain. I stored my shoes and my backpack (with my odor-proof food bag inside it) in my vestibule at night. This gave me access to all my gear in the middle of the night, but without crowding the inside of my tent with a backpack and shoes. Though this may seem unnecessary, virtually everybody on the PCT uses their vestibule. Both single- and double-wall tents typically have vestibules.
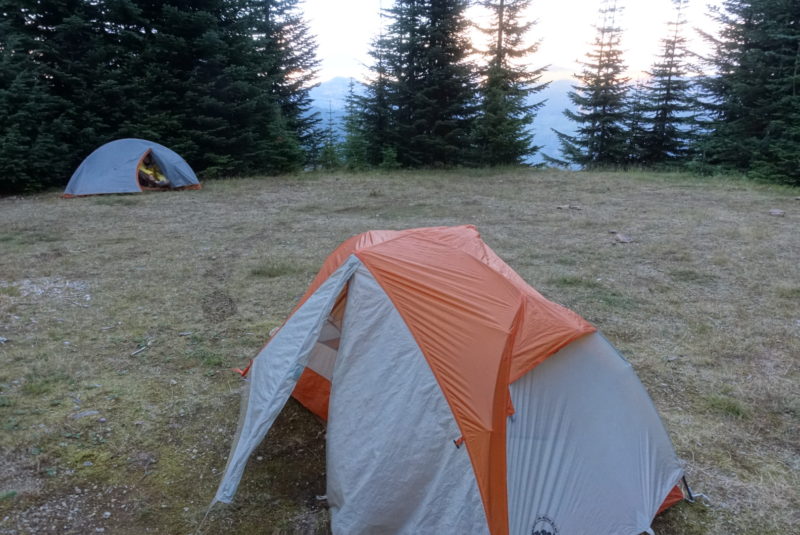
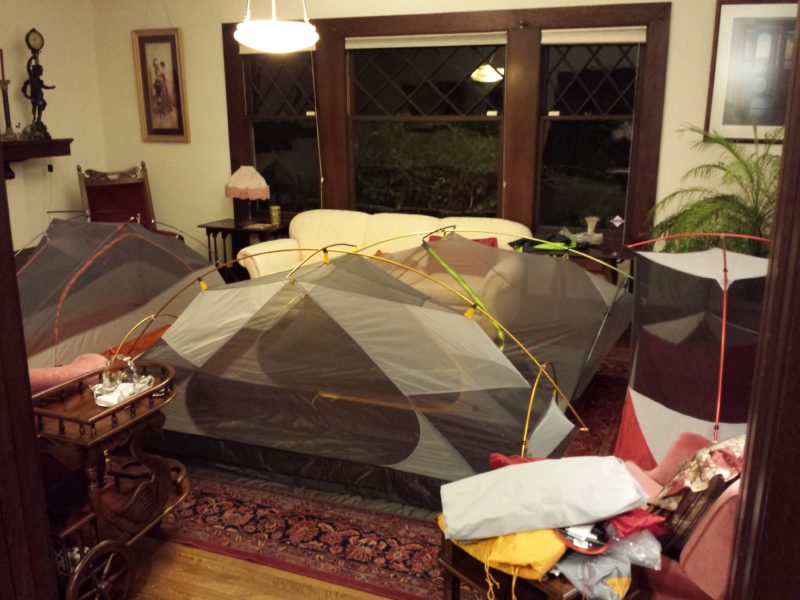
Copper Spur UL1 Review: I shopped for this tent by buying every 1-person free-standing double-wall tent that REI’s website carried. I then tried them out in my living room, and weighed them. I wanted a free-standing tent because I did a lot of weekend backpacking in Henry Coe Park, which has a lot of hard ground, and I wanted double-wall because I’d had a lot of condensation trouble with my old Tarptent Rainbow. This approach came up with the MSR Hubba, Marmot EOS Force 1, North Face Triarch, and Big Agnes Copper Spur UL1.
I found that the Marmot sagged and had no head room, the MSR was heavy and had an opaque roof, the North Face was a bit heavy (though it was a close second place overall), and the Big Agnes had a bad door design and a wildly overpriced (but optional) ground sheet. The Copper Spur’s downsides were the least objectionable to me, and it was an ounce lighter than any of the others (even counting its heavy stakes, which I planned to replace with lighter ones). So I went with the Big Agnes.
I didn’t check the rain flies, because I wasn’t expecting to use them much, and it would be a pain to pitch them in my living room. This proved to be a big mistake — I ended up using the rain fly nearly every night on the PCT.
Using the rain fly makes your tent much warmer (perhaps 10-15 degrees), and I brought an inadequate quilt, so I used the rain fly just to be sure I’d be warm enough. The Copper Spur rain fly, unfortunately, sags and flaps in the wind, no matter how you pitch it. If it’s a rainy night, or if condensation has formed on the rain fly, the flapping can shake water onto you inside the tent — like a single-wall tent, though not quite as badly. If a down quilt gets wet, it loses most of its warmth, so I spent a lot of nights feeling not quite warm enough. I would have done better with a better-designed rain fly.
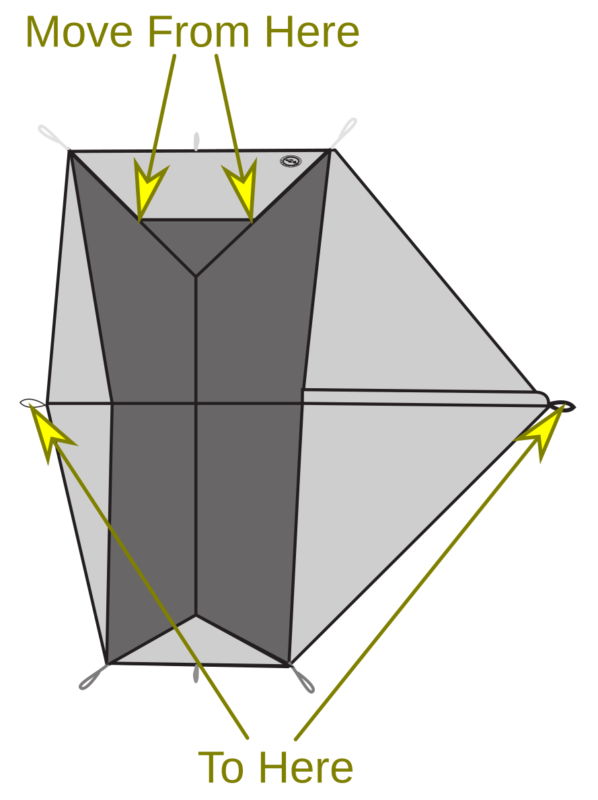
Also worth noting, the rain fly comes with guylines attached to the wrong attachment points. The attachment point on the vestibule doesn’t have a guyline. Same for the point on the opposite side of the tent from the vestibule. If you stake those two points without guylines, they sag and flap even more, and the fabric loop that makes the attachment point can easily jump off stakes. There are two points on roof of the tent that have guylines for some reason — I suggest moving those guylines to the points I mentioned.
As I mentioned earlier, the Copper Spur has an unusual door shape. The zipper is in the shape of an “upside-down U” (AKA “frowny-face”). Most tents, instead, have a “D” shaped zipper. The later allows you to open the zipper just enough to slide in without letting bugs in. You can also leave your feet sticking out the bottom, so you don’t have to bother taking your shoes off when you want to spend only a bit of time in the tent. The Copper Spur lacks this feature, so I had to take my shoes off more often, and also got more flies in my tent than necessary. I expect they chose this design to keep the zipper lighter.
As for the free-standing feature, it turns out that just isn’t very important on the PCT. Nearly every campsite has reasonably stake-able soil. The only site I stayed at where stakes couldn’t be driven into the ground was also very windy (the Knife’s Edge), so I couldn’t have free-stood anyway. (I had to build piles of rocks to hold the stakes in place. I couldn’t stake because of all the rocks in the soil, so finding rocks wasn’t a problem.) And, since I was using the rain fly almost everywhere, I ended up having to drive stakes every night anyway, just like I had a non-free standing tent. So, I carried the extra weight of a free-standing tent, but didn’t free-stand.
Seeing the stars was also not a big deal. In my tent, I was generally either blogging or sleeping. Having something to look at while I laid in bed was not much of a problem — I was exhausted and fell asleep right away. Plus, stars are not nearly no nice through mosquito netting — the grid makes it like looking at them on a computer screen.
This tent has what is known as a “bathtub floor”. This means that the floor and the lower parts of the walls are made of waterproof material, instead of mosquito mesh. This keeps water from flowing into your tent during a bad rainstorm. Unfortunately, the Copper Spur’s bathtub floor is much taller than necessary — the waterproof portion reaches almost a foot up the wall. If the water’s that deep, you should probably get out of your tent.
This is bad because, during the night, condensation often forms on the sides of that bathtub floor, since the waterproof material doesn’t breathe. This means that your down sleeping bag will absorb that condensation if it touches the wall, and will lose its ability to insulate. This is pretty much impossible to avoid while sleeping, especially if the tent is pitched on sloped ground, or if you use a quilt instead of a sleeping bag. So, the unnecessarily-tall bathtub floor will wipe water on your sleeping bag.
Over the course of this trip, I had only a few rainy nights. On most of them, the rain fly kept me pretty dry. But, one night, at Knife’s Edge, I had lateral wind in addition to rain, and the tent did a poor job of keeping the rain out. The wildly-flapping rain fly let rain in the side, onto the tent body, and eventually onto me. The wind was coming in the side opposite the vestibule, which was a worst-case scenario for this flappy rain fly. You’re supposed to pitch your tent so your toes point into the wind, but it’s not always possible to do things the right way (in fact, it was completely impossible here). This shortcoming made for the worst night on the trail.
As for ground sheets, I used a plastic sheet instead of the official Copper Spur UL1 ground sheet. The official ground sheet is $60, and is heavier than my plastic sheet, so I couldn’t bear to buy it. The downside to my plastic sheet was that it didn’t have rivets for the tent poles, or loops for stakes, so I had to worry about it blowing away while I set up my tent. Usually, it was pretty easy to hold it in place with rocks while I set up my tent, though it did blow away once, at Squaw Creek just south of I-80 (at waypoint WACS1141). All in all, I was very pleased with my groundsheet (the Polycryo size Medium from Gossamer Gear, at $10 for a 2-pack) — expect a review and advice later (in short: it’s great, but cut it with protrusions for rock weights).
Despite the low weight for its feature set, this tent has adequate interior space. I only found myself hunching over a bit, which is good for a 1-person lightweight tent (I’m about 5’9″). My toes did sometimes brush the roof while I was sleeping, but I could usually reposition myself so that didn’t happen (unless I was on sloped ground that made my sleeping pad slide towards my feet).
Notes:
– The rain fly, like most rain flies, dries miraculously quickly in the sun. 5 minutes can be enough to get it bone-dry.
– Move the rainfly’s roof guylines to the attachment points on the middle of the rainfly. This will help reduce its flappyness, give you more control over ventilation, and reduce the risk of an attachment point jumping off a stake. See the diagram above for which guylines to move.
– The Gossamer Gear Polycryo ground sheet is great.
– I suspect the North Face Triarch would’ve also worked, though I saw no other PCT hiker using it.
Pros:
– No significant damage to the body or rain fly for the entire trip.
– Can free stand, though I only used that once.
– The lightest double-wall freestanding tent that’s widely available (REI carries it in their brick-and-mortar stores — not just online — so you can even try it out in the store).
– Adequate space, including decent headroom.
Cons:
– Rain fly can’t be pitched taut, so it flaps in the wind, potentially shedding rain or condensation on you. The vestibule in particular sags badly.
– One of the heaviest 1-person thru-hiker tents I saw on the trail. Most people didn’t carry free-standing tents.
– The included stuff sack developed many holes, particularly when it was mounted on the bottom of my backpack while I was in the Sierras (I had to carry the bear canister at the top of my pack). Duck tape worked well to repair the worse holes, though I couldn’t get all of the smaller holes without pretty much covering the entire stuff sack in tape.
– Walls of the bathtub floor developed condensation, wetting my quilt.
– Condensation tended to form on my feet, probably due to reduced ventilation in that part of the tent.
– The unusual door shape lets lots of bugs in whenever you open it.
– From the factory, the guy lines were installed on the wrong loops.
– The factory ground sheet is massively overpriced.
– Factory stakes are cheap, heavy aluminum V-stakes.
– By the end of the trip, the poles were getting hard to fit together. They may just need to be cleaned.
Verdict:
I should’ve gone with a semi-freestanding tent like the REI Quarter Dome, or similar. Or, maybe, a high-end cuben fiber single-wall tent. I’d avoid double-wall Big Agnes tents because of the sagging rain fly I experienced.
Ultimately, the Copper Spur proved adequate, but the freestanding feature was unnecessary and added weight for the entirety of the trail. The double wall feature was important, but the second wall sagged and flapped, making it a poor choice for rain (though I was lucky enough to only have a few rainy nights). Although you may not use the rain fly every night, it’s probably more important to have a good rain fly than a good tent body, since it provides warmth and rain protection. When I shopped for this tent, I was thinking the other way around, because I was only thinking about hot nights in Henry Coe Park.
In short, it was heavier than necessary, for features I didn’t need, and it performed poorly in rain. But, it got me from Mexico to Canada without any serious failures.