Gear Review: Water Treatment

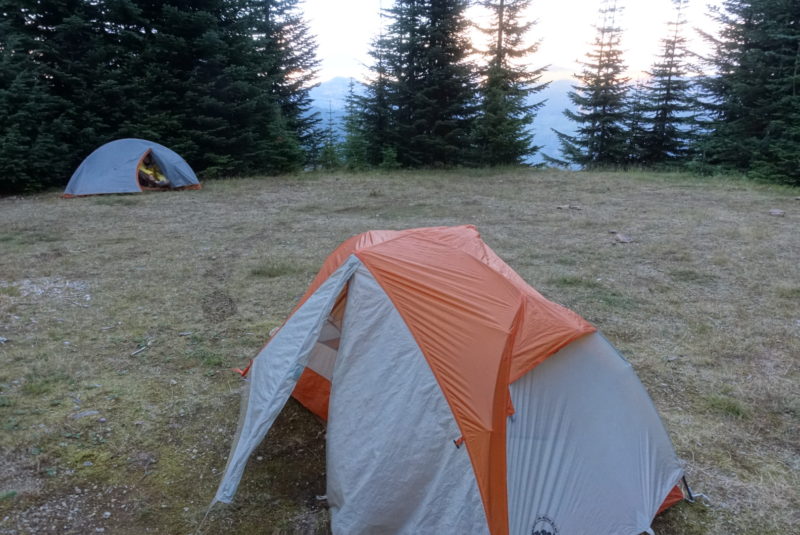
I went through several water treatment methods on the PCT. I tried:

  1. Filtering with a Sawyer filter from a Sawyer water bag into a water bladder in my backpack.
  2. Treating my water bladder with MSR Aquatabs rather than filtering.
  3. Carrying dirty water in SmartWater bottles, and drinking directly through a Sawyer filter.

I thought the last one was by far the best approach, and I observed most thru-hikers generally settled on it too. Here’s a comparison of water carrying and treatment methods which, I think, will explain why:

In Short:

Drinking through a Sawyer Squeeze filter from a SmartWater bottle requires virtually no downtime, allows cameling up, and tastes good. Drinking pre-treated water from a water bladder is a little more convenient while you’re moving, but requires a lot of downtime, and encourages you to carry too much water. Tablets are a very good idea as backup, since filters do fail and tablets weigh almost nothing. But, they don’t taste good, and require you to carry water you can’t drink for a while, effectively increasing your pack weight.

Since pack weight is so important, and water is heavy, the method that lets you carry the least water is the best. The fact that it tastes good and allows less downtime around mosquitoes is icing on the cake.

Additionally, I suggest swapping the Squeeze’s mouthpiece with one from a 700ml SmartWater “sport” bottle, and carrying a scoop/cup to aid in water collection from awkwardly-shaped water sources.

In Long:

When to Treat:

If you use a water filter, you can either treat your water at the when you collect it, and carry clean water, or you can carry dirty water and drink straight through the filter. Here are the pros and cons of each:


Filter at the Water Source Pros:

  • The Sawyer directions suggest this approach.
  • If you want a rest anyway, you can do something productive while resting.
  • Certain carrying methods require this (e.g. unless you use an inline filter, having a water bladder in your pack requires pre-treated water).
  • Allows you to give more attention to the water being filtered. E.g. you can watch for clumps of algae more easily.

Filter at the Water Source Cons:

  • Takes a long time.
  • You need to carry separate water vessels for clean and dirty water.
  • Some water sources are unpleasant places, particularly due to mosquitoes. Standing still is the last thing you want to do near mosquitoes.


Drink Through the Filter Pros:

  • Takes virtually no time at most water sources.
  • You can rest when you want, rather than having to rest at water sources.
  • You can “upgrade” your water if you find a nicer source soon after a dirty one, avoiding unnecessary clogging and improving flavor.
  • My sister won’t complain about how long you’re taking at water sources.

Drink Through the Filter Cons:

  • As the filter clogs, it will get frustratingly slow to drink.
  • You need to tip the water bottle up while you drink, which makes it hard to look at the trail, which increases the risk of tripping.


Carrying Vessels:

Water Bladder Pros:

  • Convenient to drink from. You won’t dehydrate yourself just because it’s inconvenient to reach your water.
  • Places all your water right next to your spine, which can be good for pack balance.

Water Bladder Cons:

  • Refilling requires emptying and re-packing your pack. When I used a Sawyer filter and a water bladder, a complete fill-up took me 10-15 minutes. Because of this, you will do longer water carries than you need, effectively adding pounds to your pack.
  • Water bladders can’t freestand, making refilling them precarious. Awkwardly balancing the flexible sides between your knees will become an everyday anxiety. Expect to have it tip over and empty out all of your painstakingly filtered water a few times.
  • Can develop leaks at stress points, which you probably won’t notice until your water is unexpectedly gone and your pack is wet.


Sawyer Bag Pros:

  • It comes with the filter and the directions say to use it.
  • ???

Sawyer Bag Cons:

  • Awkward shape doesn’t fit in most pockets when full.
  • Notorious for developing leaks near the neck, which makes it impossible to maintain pressure and therefore to treat your water.
  • Somewhat soft-sided, so it can collapse and spill easily.
  • Difficult to fill if falling water is unavailable. Without rigid sides, it won’t fill up when you submerge it in standing water. You can fill it by yanking it back and forth, but this stirs up silt that will clog your filter.
  • Opaque, so you can’t see if you picked up debris that will clog your filter.


SmartWater Bottle Pros:

  • Cheap, durable, and easy to replace.
  • Free-standing.
  • Fills quickly. Collecting water takes almost no time at all, you just reach down and fill up.
  • You can cut one down to make a cup/scoop, for gathering water from awkwardly-shaped water sources. You can also cover the scoop with a bandanna when collecting water from very poor quality sources, to pre-filter out larger debris, which helps your filter last longer.
  • The tall and skinny 1L size fits well in most backpack side pockets.
  • Easy to expand carrying capacity — just stuff more bottles wherever they’ll fit.

SmartWater Bottle Cons:

  • Backpack side pockets are not always easy to reach. I had to rearrange the contents of my pack to make it easier to slide my water bottles in and out of the side pockets.
  • They won’t fit in some shallow or narrow water sources (if that happens, use a scoop to collect, use your trowel to dig the source deeper, or check upstream/downstream for an easier collection point).
  • When drinking from a directly-attached filter, you need to periodically disconnect and reconnect the bottle to let air in and equalize the pressure.
  • They look like they should leak after the wear and tear of daily trail use (but, they don’t).

Treatment Methods:

Sawyer Squeeze Pros:

  • You can camel up. If you drink 1L while you’re at the water source, that’s 2.2lbs you don’t need to carry.
  • High flow rate.
  • Takes a long time to clog, so long as you take reasonable care of it.
  • The water tastes like water.

Sawyer Squeeze Cons:

  • It you allow its temperature to get below freezing, water retained in the microscopic tubes within can freeze, which can cause the tubes to rupture. This will make it ineffective at filtering out pathogens, and there is no way to tell until you get sick. Take it inside your tent on nights that might drop below freezing. Replace it if you think it might’ve frozen.
  • A little leaky where it screws onto the dirty water bottle.
  • The rubber grommet that seals the connection to the dirty water bottle can be damaged from overtightening, greatly increasing dirty water leakage. It will take some experience to learn how tight is just right. You may ruin a grommet or two in the process — perhaps carrying spares would be a good idea (I didn’t, but I’d used these filters for a long time before my hike).
  • The factory mouthpiece is inconvenient and requires two hands — and those hands probably have dirty water on them. I recommend swapping it for the mouthpiece that comes on Smartwater 700ml “sport” bottles, which is much more convenient and has compatible threads.
  • Requires periodic backflushing to keep the flow rate good.
  • Will eventually clog up, but with enough backflushing this can take a very long time. (The packaging’s claim that it can treat a million gallons is ridiculous, however — consider this a consumable item, like shoes).


Sawyer Mini Pros:

  • 1oz lighter than the Squeeze, but still treats all the same pathogens and allows cameling up.
  • The more angular shape makes it harder for dirty water to dribble into your mouth from a bad seal.
  • Mouthpiece is more convenient than Squeeze’s factory mouthpiece (but is not replaceable)

Sawyer Mini Cons:

  • Much slower flow than the Squeeze. It’s frustrating to drink from when you’re thirsty and walking. Get used to looking down at the trail out of the corner of your eye while drinking.
  • Clogs much faster than the Squeeze. I managed to get one to last 900 miles, but this is highly unusual. I pre-filtered dirty water through a bandanna into a scoop to slow clogging, and I thoroughly backflushed at nearly every resupply. It was still agonizingly slow near the end.
  • Grommet can be damaged more easily than the Squeeze.
  • Everything form the Squeeze


MSR Tablet Pros:

  • Even lighter than a Mini
  • Faster than chlorine tablets
  • Less work than filtering into a clean bottle/bladder
  • They weight basically nothing and can treat any pathogen you’d find in PCT water. I strongly recommend carrying these as a backup for your Squeeze, in case the Squeeze freezes, gets dirty water on the clean side, or is otherwise compromised.

MSR Tablet Cons:

  • Can’t camel up, effectively adding pounds to your pack during wetter sections of the trail.
  • Supposedly requires you to shake the water for the first 10 minutes of treatment to be effective.
  • Each tablet treats 2L, which is an inconvenient size — bottles are usually 1L, and bladders are usually 3L. You can break them in half, but it’s hard to do cleanly.
  • Water tastes like treatment chemical (but, not nearly as bad as iodine or chlorine tablets).
  • Takes 40 minutes before you can drink, which is agonizing at times.

Advice: Nuts-and-bolts Logistics Details from the PCT-L

Just before my hike, I had a series of questions about logistical details, like which resupply points were preferable, or whether to carry quarters for coin showers.  I also found it hard to distinguish between the kind of advice people give, and the kind of advice they follow (e.g. it’s easy to tell people to take a bear canister everywhere, but do people actually do that?)  I found no conclusive information for this on the web, so I asked the PCT-L mailing list.  I got many useful answers, and my hike was a success.  Then, I wrote back to the PCT-L, providing my own take on the answers to my questions:

Q. On the JMT, it seemed like MTR was the obvious place to resupply, since it’s the last point (southbound) that’s close to the trail, until Whitney Portal / Lone Pine. But, it seems like most PCT thru-hikers skip MTR and resupply at VVR or Red’s Meadow, making that long stretch a couple days longer. Why? Or am I wrong about PCT hikers skipping MTR?

A. Resupplying at MTR takes a lot of planning (they have strict shipment guidelines, shipping takes a long time, and they’re strict about when you can pick it up). Trying to plan resupplies way in advance doesn’t work very well. It was hard to predict what I’d want to eat, and how much of it. Buying my food for the next few days in person was always preferable.

So, I resupplied south of MTR at Independence (via Kearsarge Pass) and north of MTR at Mammoth (via Red’s Meadow), for a carry of about 125 miles. That’s not a whole lot worse than the standard JMT stretch from MTR to Whitney Portal.

The Kearsarge detour was scenic enough to be worthwhile in its own right. And, Mammoth is a full-sized town with proper outdoor supply stores — I was able to replace my worn-out shoes there with just the right model.

I think MTR is so popular for JMT hikers because they’re finishing in Whitney Portal (which is north of Independence). Whitney Portal’s a fine place to go home from, but not good for a resupply, because it only has a souvenir shop.

Q. I’ve never hitchhiked before. Is there any etiquette I should know about, e.g. are hitchhikers expected to pay for gas?

A. I offered to pay a few times, but nobody was ever interested. Mostly just smile, be cheerful, and have a conversation. Nobody picks up hitchhikers for the money, so far as I can tell.  Nearly every hitch I got was from a local who already knew about the PCT, and many of them had come out to the trail expressly to give PCT hikers rides.  So they were clearly just doing it for fun.  So be fun.

Q. Is it usually easy to get change for a coin shower, or should I carry quarters?

A. Some way of getting quarters almost always seems to materialize. The Camp Host will often make change, if you’re at a paid campsite (which is usually where coin showers are).

However, I avoided coin showers when possible, for a few reasons:

  1. I might run out of time while soapy.
  2. Getting soap and shampoo was sometimes time-consuming, expensive, or impossible.
  3. Getting a proper towel was usually impossible.
  4. Tiny pack towels mean you’ll be really cold for a while while you sloooowly dry off. Then, you’ll have to dry out and carry a piece of gear that’s saturated with scented toiletries. This can attract animals to your pack at night.

Q. Resupplying at Walker Pass on 178 seems really hard, but necessary if I’m going to avoid 7+ days between resupplies. I’ve looked at a few options, and none look very good: Getting friends/family to pick me up (they live far away), taking the Kern County bus (it runs infrequently), arranging taxi ride (very expensive), or hitchhiking (I think it’s a fast, little-used stretch of highway?). Are there any options I overlooked?

A. There’s a lot of trail angeling here. Otherwise, the bus is probably your best bet. I called in my family — this is a good place to for that, since they haven’t seen you for about a month now, and probably miss you (and, they can drive you to Ridgecrest, which has much better supplies and cheaper hotels than the easier hitch to Lake Isabella).

Q. Does leaving the rain fly off of a double-wall tent cause, or prevent condensation?

A. This is an eternal question. It’s definitely a whole lot warmer with the fly on, though, and that was always the primary concern. I ended up pitching my rain fly on all but a handful of nights, because my quilt was inadequate.

Q. If you mail a resupply package or bounce box for general delivery, but aren’t able to pick it up, what happens? E.g. suppose my bounce box gets held up in the mail, and I’m days past the post office by the time it’s finally delivered? And, what if the destination is not a post office?

A. This never happened to me, as I mostly avoided mailed resupplies. But, my understanding is: If it’s a post office, and you shipped via Priority Mail, you can request that it be redirected to a different address (such as the next resupply point). If it’s not a post office, they keep it.  VVR is notorious for selling supplies taken from unclaimed resupply packages.

Q. On the Class of 2006 PCT DVD, it looked like people might’ve been carrying bear cans in their packs in Washington (at least, it looked like there was something large and cylindrical inside their packs). I was under the impression that people normally carry bear cans only from Kennedy Meadows to Sonora Pass. Are they necessary (or realistically advisable) anywhere else?

A. I only saw a few thru-hikers who used bear canisters outside the Sierras.  I stored my food in an odor-proof bag (an Opsak) inside my trash-compactor-bag-lined backpack, in my tent vestibule.  I never had problems.

Note that as of 2017, you need a bear canister if you plan on staying overnight in Lassen.  However, that’s not a very long stretch, and is easy to do in a day, so I don’t think it’s worth the logistical difficulties of obtaining a bear canister just to schedule an overnight stay there.  It’s also one of the more drab parts of the trail — the PCT doesn’t go through any of the reportedly-interesting parts of Lassen — so I wouldn’t recommend it unless you’re planning an overnight side-trip in Lassen.

Q. In areas where bear cans aren’t required, do people do bear bag hangs? If so, for the whole trail, or only certain sections? Which?

A. I didn’t see a single proper bear hang anywhere on the trail. Usually, bear hangs were a sign that we were in a campsite with first-time backpackers. The most common food storage method was to keep it inside an Opsak, inside your backpack, and either keep your backpack in your vestibule or your tent.

Q. Is it possible to rent microspikes or crampons? I don’t have any plans to use them beyond this trip, so I’d rather not buy them. But, I haven’t been able to find any sites that rent them by mail, like how you can rent bear cans.

A. I didn’t find any. I suggested it to Wild Ideas, and they pointed out that people might worry about the reliability of used safety gear. I could definitely see people abusing rented Microspikes (e.g. not bothering to take them off on the rocks).

Incidentally, I regret bringing Microspikes through the Sierras.  In 2016, it was an average snow year (perhaps opinions differ for 2017’s deluge).  In none of the snow patches did I feel that Microspikes kept me safe where I would have been unsafe without them.  Mostly they just helped me go a bit faster through the snow patch.  It wasn’t worth carrying a pound of metal through the Sierras just to go a little faster for maybe 5-10 miles.

Q. I’ve read advice that you don’t really need more raingear than a poncho, because it doesn’t matter if your legs get cold, and your feet will get wet no matter what you do. So, I tried to test this during a rainstorm a few weeks ago, by hiking about 4 hours in a DriDucks poncho and REI Sahara outfit, with a loaded backpack. I got sick, and am still coughing. It rained about an inch, the temperature was in the high 40s F, and wind gusts were about 50MPH. What should I have done differently to handle that kind of weather? Used more insulation under the poncho? Added rain pants or high gaiters? Stayed home?

A. I clung to that poncho for most of the trail. It was about as useful as carrying a brick (well, an 8 ounce brick). Mainly I used it as town clothes while I was doing laundry, and it was inadequate for that too.

When it finally did rain in earnest, I got really cold, because the sleeves don’t cover my forearms (I walked many miles with my arms curled up like a T-Rex to keep warm). And, the giant arm holes let in lots of wind and rain.  If the rain is mild enough that that poncho is helpful, you probably don’t need any raingear at all.

I bought a proper rain jacket near Snoqualmie (some kind of Outdoor Research Pertex jacket), and it was a godsend. Not only did it keep me much drier when the weather was rainy, it made me realize that wearing raingear as a windbreaker is tremendously useful in weather that’s not rainy but is chilly. I wished I’d started the trail with this.

I never got rain pants, but by Northern Washington I probably should have. Having soaked legs was really cold at times, and several times I found myself in situations where I’d certainly get dangerously cold if I stopped moving. I was the only person I saw at the Northern Terminus that didn’t have rain pants on.

Q. The 2014 PCT DVD shows what looks like an abandoned wrecking ball at Sunrise Trailhead. Does anyone know the story behind that? There’s also an abandoned wrecking ball in Henry W Coe Park — are wrecking balls in the wilderness a thing??  Is somebody doing a nationwide art project?

A. Another eternal mystery… Seriously, I don’t know what the deal is, and I’m still wondering. Since then, I’ve seen another one by the roadside in a rural area.

Update: Apparently they’re for clearing brush.  You attach a chain between a tractor and the wrecking ball, and drive in a circle.

Gear Review: Big Agnes Copper Spur UL1 Tent

Copper Spur UL1, foreground

Big Agnes Copper Spur UL1 Tent2stars

I shopped for a tent about 6 months before deciding to do my PCT thru-hike. At the time, I was using a Tarptent Rainbow, and was sick of a couple problems I was having with it: Condensation, and driving stakes in hard ground.

First, let me explain a few terms to describe tents:

Free-standing: Free-standing tents can stand up without any stakes. This is handy on nights that aren’t windy, or ground that is difficult to drive stakes into. Some tents, like my Tarptent Rainbow, are not free-standing — they’ll tip over if you don’t drive the stakes into the ground. Non-free-standing designs tend to be lighter, but you need to drive stakes every night, even if there is no wind, and even is the ground is not receptive to stakes.

Recently, a type of tent has appeared on the market called “semi-free-standing”. These can stand up without stakes, but the roof will sag onto your feet unless you stake two corners of the tent down. This is less staking than non-free-standing tents, which usually require at least 6 stakes.

Single/Double-wall: A double-wall tent is made of two pieces: A tent body, made primarily of mosquito netting, and a rain fly, which is a waterproof sheet that can be pitched above the body. Single-wall tents have only one roof, and it’s waterproof — the body is the rain fly. There is therefore no need for a separate rain fly. Single-wall tents are substantially lighter than double-wall tents, since there are fewer walls. For the same reason, they can also be faster to set up.

Double-wall tents have several major advantages over single-wall. You can leave off the waterproof roof when you don’t need it, so you can see the stars. Leaving off the rain fly is also nice on very hot nights, when a waterproof roof will trap too much heat (though on my PCT hike, I only had a few such nights). Additionally, the air circulation between the rain fly and mesh body of a double-wall tent greatly reduces condensation — single-wall tent owners often wake up to find their walls and roof coated in water. On windy nights, a condensation-coated roof that’s flapping in the wind will drop water on you. When you do get condensation in a double-wall tent, almost all of it will be on the rain fly, which is easier to hang up and dry than a single-wall tent body.

Vestibule: This is an area outside the door of your tent, but still under the rain fly. That is, it has a roof, but no floor or walls.  It’s useful for storing gear overnight that you don’t want inside the tent body, but want near your tent and protected from rain. I stored my shoes and my backpack (with my odor-proof food bag inside it) in my vestibule at night. This gave me access to all my gear in the middle of the night, but without crowding the inside of my tent with a backpack and shoes.  Though this may seem unnecessary, virtually everybody on the PCT uses their vestibule. Both single- and double-wall tents typically have vestibules.

Copper Spur UL1 Review: I shopped for this tent by buying every 1-person free-standing double-wall tent that REI’s website carried. I then tried them out in my living room, and weighed them. I wanted a free-standing tent because I did a lot of weekend backpacking in Henry Coe Park, which has a lot of hard ground, and I wanted double-wall because I’d had a lot of condensation trouble with my old Tarptent Rainbow. This approach came up with the MSR Hubba, Marmot EOS Force 1, North Face Triarch, and Big Agnes Copper Spur UL1.

From left to right: Big Agnes Copper Spur UL1 (orange), North Face Triarch 1 (yellow), Marmot Force EOS 1 (green), MSR Hubba (red).

I found that the Marmot sagged and had no head room, the MSR was heavy and had an opaque roof, the North Face was a bit heavy (though it was a close second place overall), and the Big Agnes had a bad door design and a wildly overpriced (but optional) ground sheet. The Copper Spur’s downsides were the least objectionable to me, and it was an ounce lighter than any of the others (even counting its heavy stakes, which I planned to replace with lighter ones). So I went with the Big Agnes.

I didn’t check the rain flies, because I wasn’t expecting to use them much, and it would be a pain to pitch them in my living room. This proved to be a big mistake — I ended up using the rain fly nearly every night on the PCT.

Using the rain fly makes your tent much warmer (perhaps 10-15 degrees), and I brought an inadequate quilt, so I used the rain fly just to be sure I’d be warm enough. The Copper Spur rain fly, unfortunately, sags and flaps in the wind, no matter how you pitch it. If it’s a rainy night, or if condensation has formed on the rain fly, the flapping can shake water onto you inside the tent — like a single-wall tent, though not quite as badly. If a down quilt gets wet, it loses most of its warmth, so I spent a lot of nights feeling not quite warm enough. I would have done better with a better-designed rain fly.

Also worth noting, the rain fly comes with guylines attached to the wrong attachment points. The attachment point on the vestibule doesn’t have a guyline. Same for the point on the opposite side of the tent from the vestibule. If you stake those two points without guylines, they sag and flap even more, and the fabric loop that makes the attachment point can easily jump off stakes. There are two points on roof of the tent that have guylines for some reason — I suggest moving those guylines to the points I mentioned.

A top-view diagram of the Copper Spur UL1, with rain fly. The arrows show you which factory-attached guylines to move, and where to move them to.

As I mentioned earlier, the Copper Spur has an unusual door shape. The zipper is in the shape of an “upside-down U” (AKA “frowny-face”). Most tents, instead, have a “D” shaped zipper. The later allows you to open the zipper just enough to slide in without letting bugs in. You can also leave your feet sticking out the bottom, so you don’t have to bother taking your shoes off when you want to spend only a bit of time in the tent. The Copper Spur lacks this feature, so I had to take my shoes off more often, and also got more flies in my tent than necessary. I expect they chose this design to keep the zipper lighter.

As for the free-standing feature, it turns out that just isn’t very important on the PCT. Nearly every campsite has reasonably stake-able soil. The only site I stayed at where stakes couldn’t be driven into the ground was also very windy (the Knife’s Edge), so I couldn’t have free-stood anyway. (I had to build piles of rocks to hold the stakes in place. I couldn’t stake because of all the rocks in the soil, so finding rocks wasn’t a problem.) And, since I was using the rain fly almost everywhere, I ended up having to drive stakes every night anyway, just like I had a non-free standing tent. So, I carried the extra weight of a free-standing tent, but didn’t free-stand.

Seeing the stars was also not a big deal. In my tent, I was generally either blogging or sleeping. Having something to look at while I laid in bed was not much of a problem — I was exhausted and fell asleep right away. Plus, stars are not nearly no nice through mosquito netting — the grid makes it like looking at them on a computer screen.

This tent has what is known as a “bathtub floor”. This means that the floor and the lower parts of the walls are made of waterproof material, instead of mosquito mesh. This keeps water from flowing into your tent during a bad rainstorm. Unfortunately, the Copper Spur’s bathtub floor is much taller than necessary — the waterproof portion reaches almost a foot up the wall. If the water’s that deep, you should probably get out of your tent.

This is bad because, during the night, condensation often forms on the sides of that bathtub floor, since the waterproof material doesn’t breathe. This means that your down sleeping bag will absorb that condensation if it touches the wall, and will lose its ability to insulate. This is pretty much impossible to avoid while sleeping, especially if the tent is pitched on sloped ground, or if you use a quilt instead of a sleeping bag. So, the unnecessarily-tall bathtub floor will wipe water on your sleeping bag.

Over the course of this trip, I had only a few rainy nights. On most of them, the rain fly kept me pretty dry. But, one night, at Knife’s Edge, I had lateral wind in addition to rain, and the tent did a poor job of keeping the rain out. The wildly-flapping rain fly let rain in the side, onto the tent body, and eventually onto me. The wind was coming in the side opposite the vestibule, which was a worst-case scenario for this flappy rain fly. You’re supposed to pitch your tent so your toes point into the wind, but it’s not always possible to do things the right way (in fact, it was completely impossible here). This shortcoming made for the worst night on the trail.

As for ground sheets, I used a plastic sheet instead of the official Copper Spur UL1 ground sheet. The official ground sheet is $60, and is heavier than my plastic sheet, so I couldn’t bear to buy it. The downside to my plastic sheet was that it didn’t have rivets for the tent poles, or loops for stakes, so I had to worry about it blowing away while I set up my tent. Usually, it was pretty easy to hold it in place with rocks while I set up my tent, though it did blow away once, at Squaw Creek just south of I-80 (at waypoint WACS1141). All in all, I was very pleased with my groundsheet (the Polycryo size Medium from Gossamer Gear, at $10 for a 2-pack) — expect a review and advice later (in short: it’s great, but cut it with protrusions for rock weights).

Despite the low weight for its feature set, this tent has adequate interior space. I only found myself hunching over a bit, which is good for a 1-person lightweight tent (I’m about 5’9″). My toes did sometimes brush the roof while I was sleeping, but I could usually reposition myself so that didn’t happen (unless I was on sloped ground that made my sleeping pad slide towards my feet).

Notes:
– The rain fly, like most rain flies, dries miraculously quickly in the sun. 5 minutes can be enough to get it bone-dry.
– Move the rainfly’s roof guylines to the attachment points on the middle of the rainfly. This will help reduce its flappyness, give you more control over ventilation, and reduce the risk of an attachment point jumping off a stake. See the diagram above for which guylines to move.
– The Gossamer Gear Polycryo ground sheet is great.
– I suspect the North Face Triarch would’ve also worked, though I saw no other PCT hiker using it.

Pros:
– No significant damage to the body or rain fly for the entire trip.
– Can free stand, though I only used that once.
– The lightest double-wall freestanding tent that’s widely available (REI carries it in their brick-and-mortar stores — not just online — so you can even try it out in the store).
– Adequate space, including decent headroom.

Cons:
– Rain fly can’t be pitched taut, so it flaps in the wind, potentially shedding rain or condensation on you. The vestibule in particular sags badly.
– One of the heaviest 1-person thru-hiker tents I saw on the trail. Most people didn’t carry free-standing tents.
– The included stuff sack developed many holes, particularly when it was mounted on the bottom of my backpack while I was in the Sierras (I had to carry the bear canister at the top of my pack).  Duck tape worked well to repair the worse holes, though I couldn’t get all of the smaller holes without pretty much covering the entire stuff sack in tape.
– Walls of the bathtub floor developed condensation, wetting my quilt.
– Condensation tended to form on my feet, probably due to reduced ventilation in that part of the tent.
– The unusual door shape lets lots of bugs in whenever you open it.
– From the factory, the guy lines were installed on the wrong loops.
– The factory ground sheet is massively overpriced.
– Factory stakes are cheap, heavy aluminum V-stakes.
– By the end of the trip, the poles were getting hard to fit together. They may just need to be cleaned.

Verdict:
I should’ve gone with a semi-freestanding tent like the REI Quarter Dome, or similar. Or, maybe, a high-end cuben fiber single-wall tent. I’d avoid double-wall Big Agnes tents because of the sagging rain fly I experienced.

Ultimately, the Copper Spur proved adequate, but the freestanding feature was unnecessary and added weight for the entirety of the trail. The double wall feature was important, but the second wall sagged and flapped, making it a poor choice for rain (though I was lucky enough to only have a few rainy nights). Although you may not use the rain fly every night, it’s probably more important to have a good rain fly than a good tent body, since it provides warmth and rain protection. When I shopped for this tent, I was thinking the other way around, because I was only thinking about hot nights in Henry Coe Park.

In short, it was heavier than necessary, for features I didn’t need, and it performed poorly in rain. But, it got me from Mexico to Canada without any serious failures.